
Case Study
Price will be increasing once we reach our next member milestone. Lock a lower price in forever before it’s too late.

CONCRETE SPALLING REPAIR
SUCCESS STORY
Reviving A Concrete Pool: From Bad to Brilliant!
Scroll for more
CLIENT PROFILE
Client: Owners Corporation
Sector: Industrial Warehouses
Location: Alexandria, Sydney
Project Value: $250,000
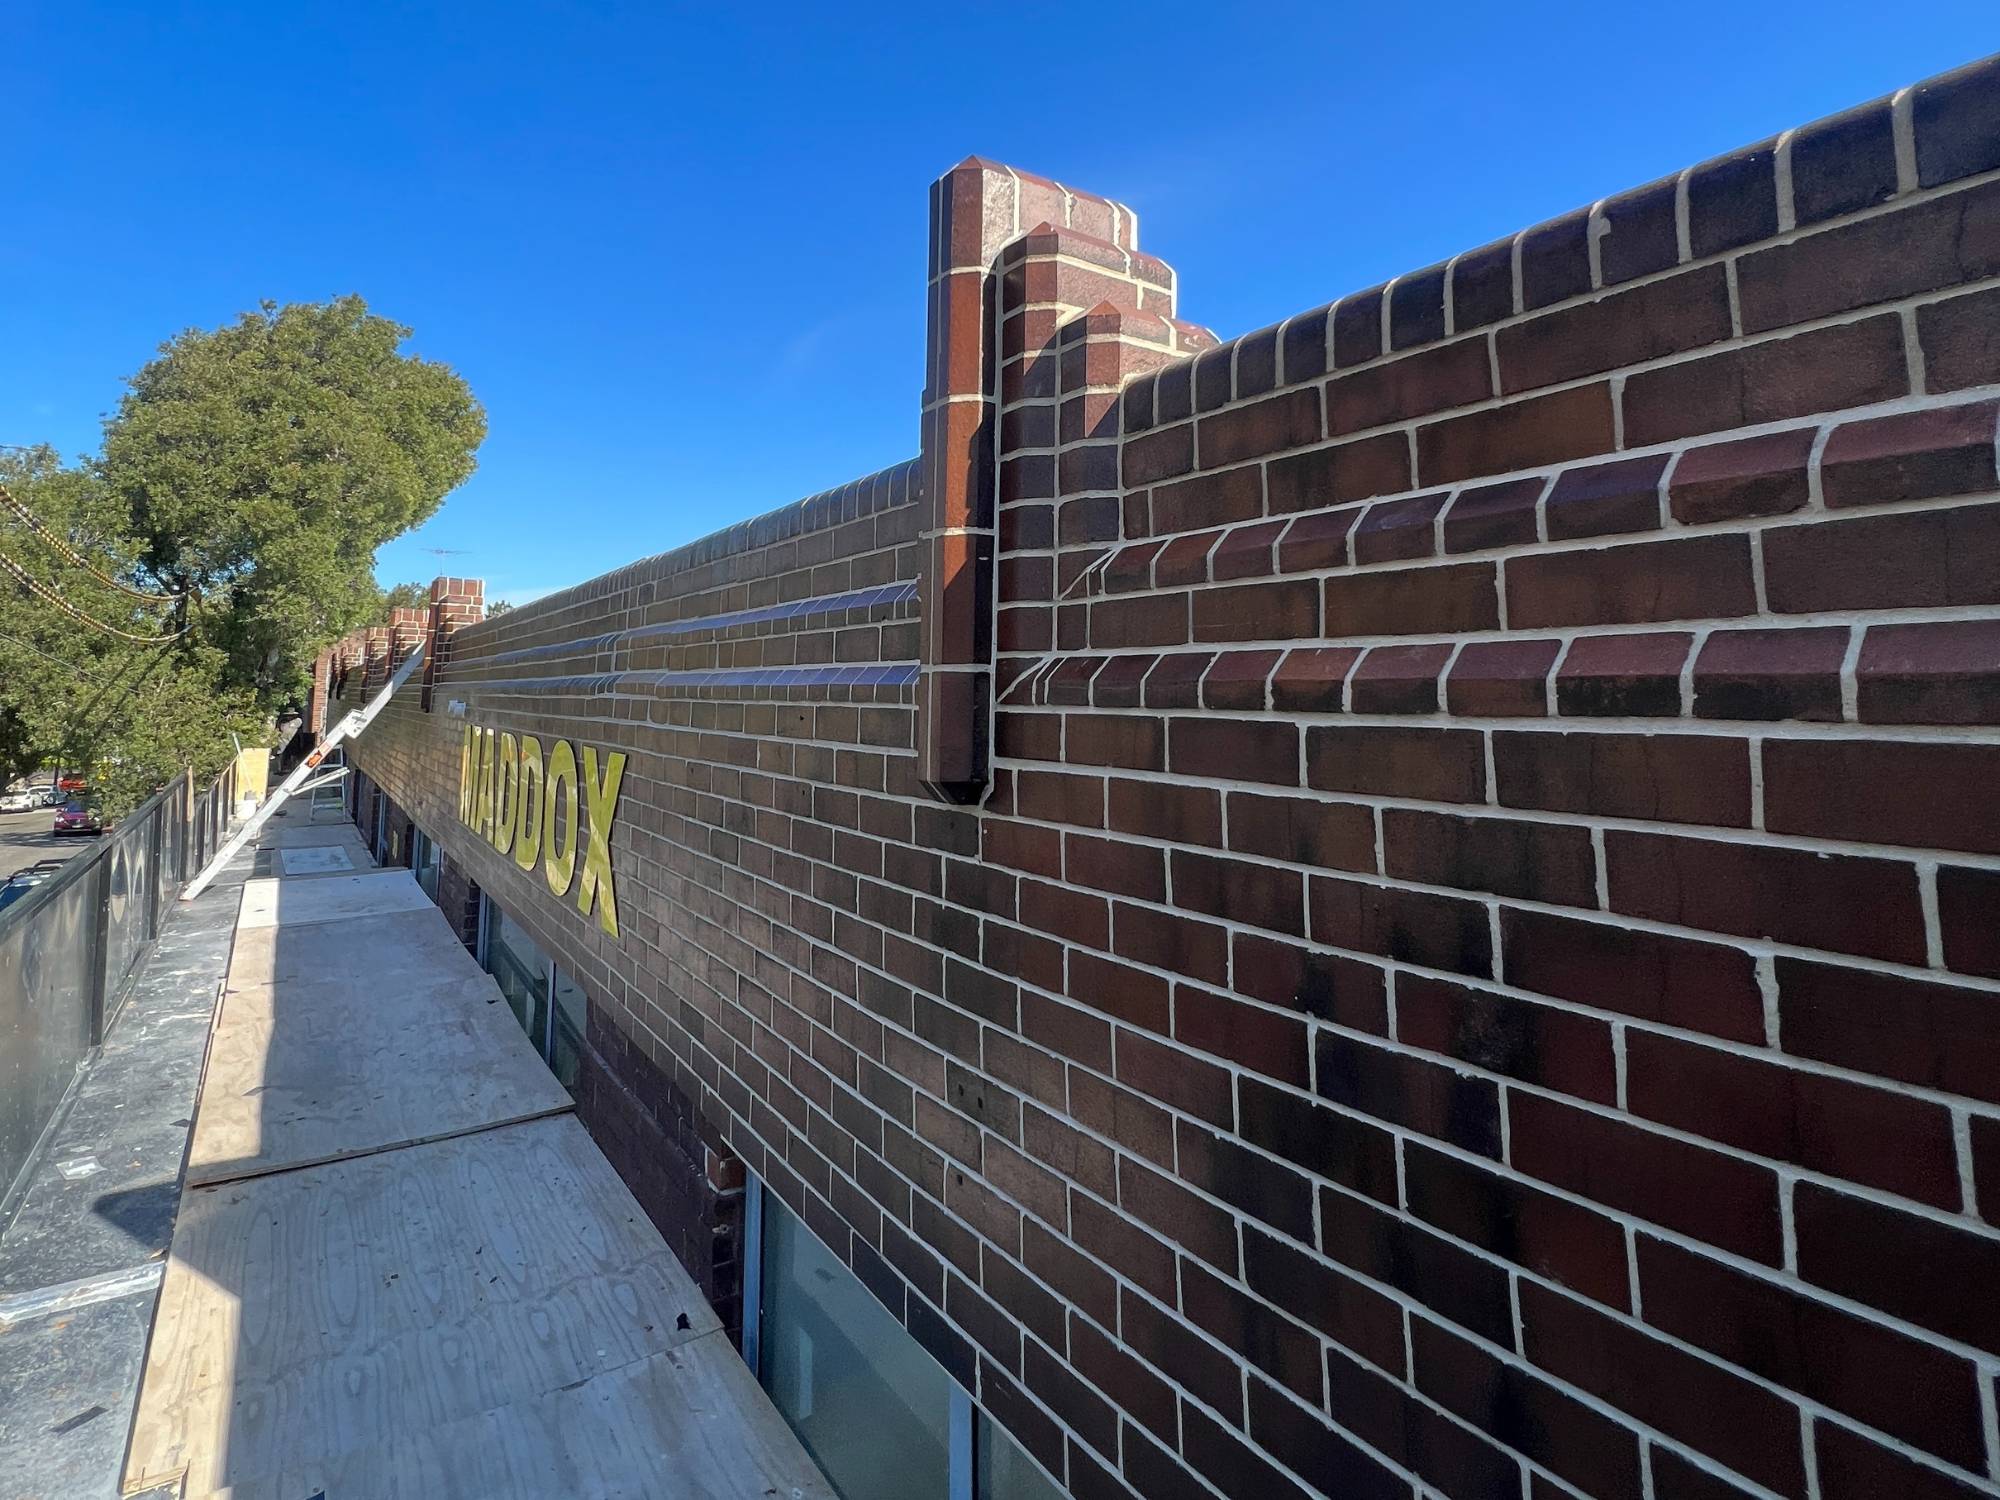
Background: Faced with a heritage facade suffering from deterioration and a leaky roof, the owners confronted critical issues impacting historical integrity, structure and insurance premiums.
.jpeg)
THE CHALLENGE
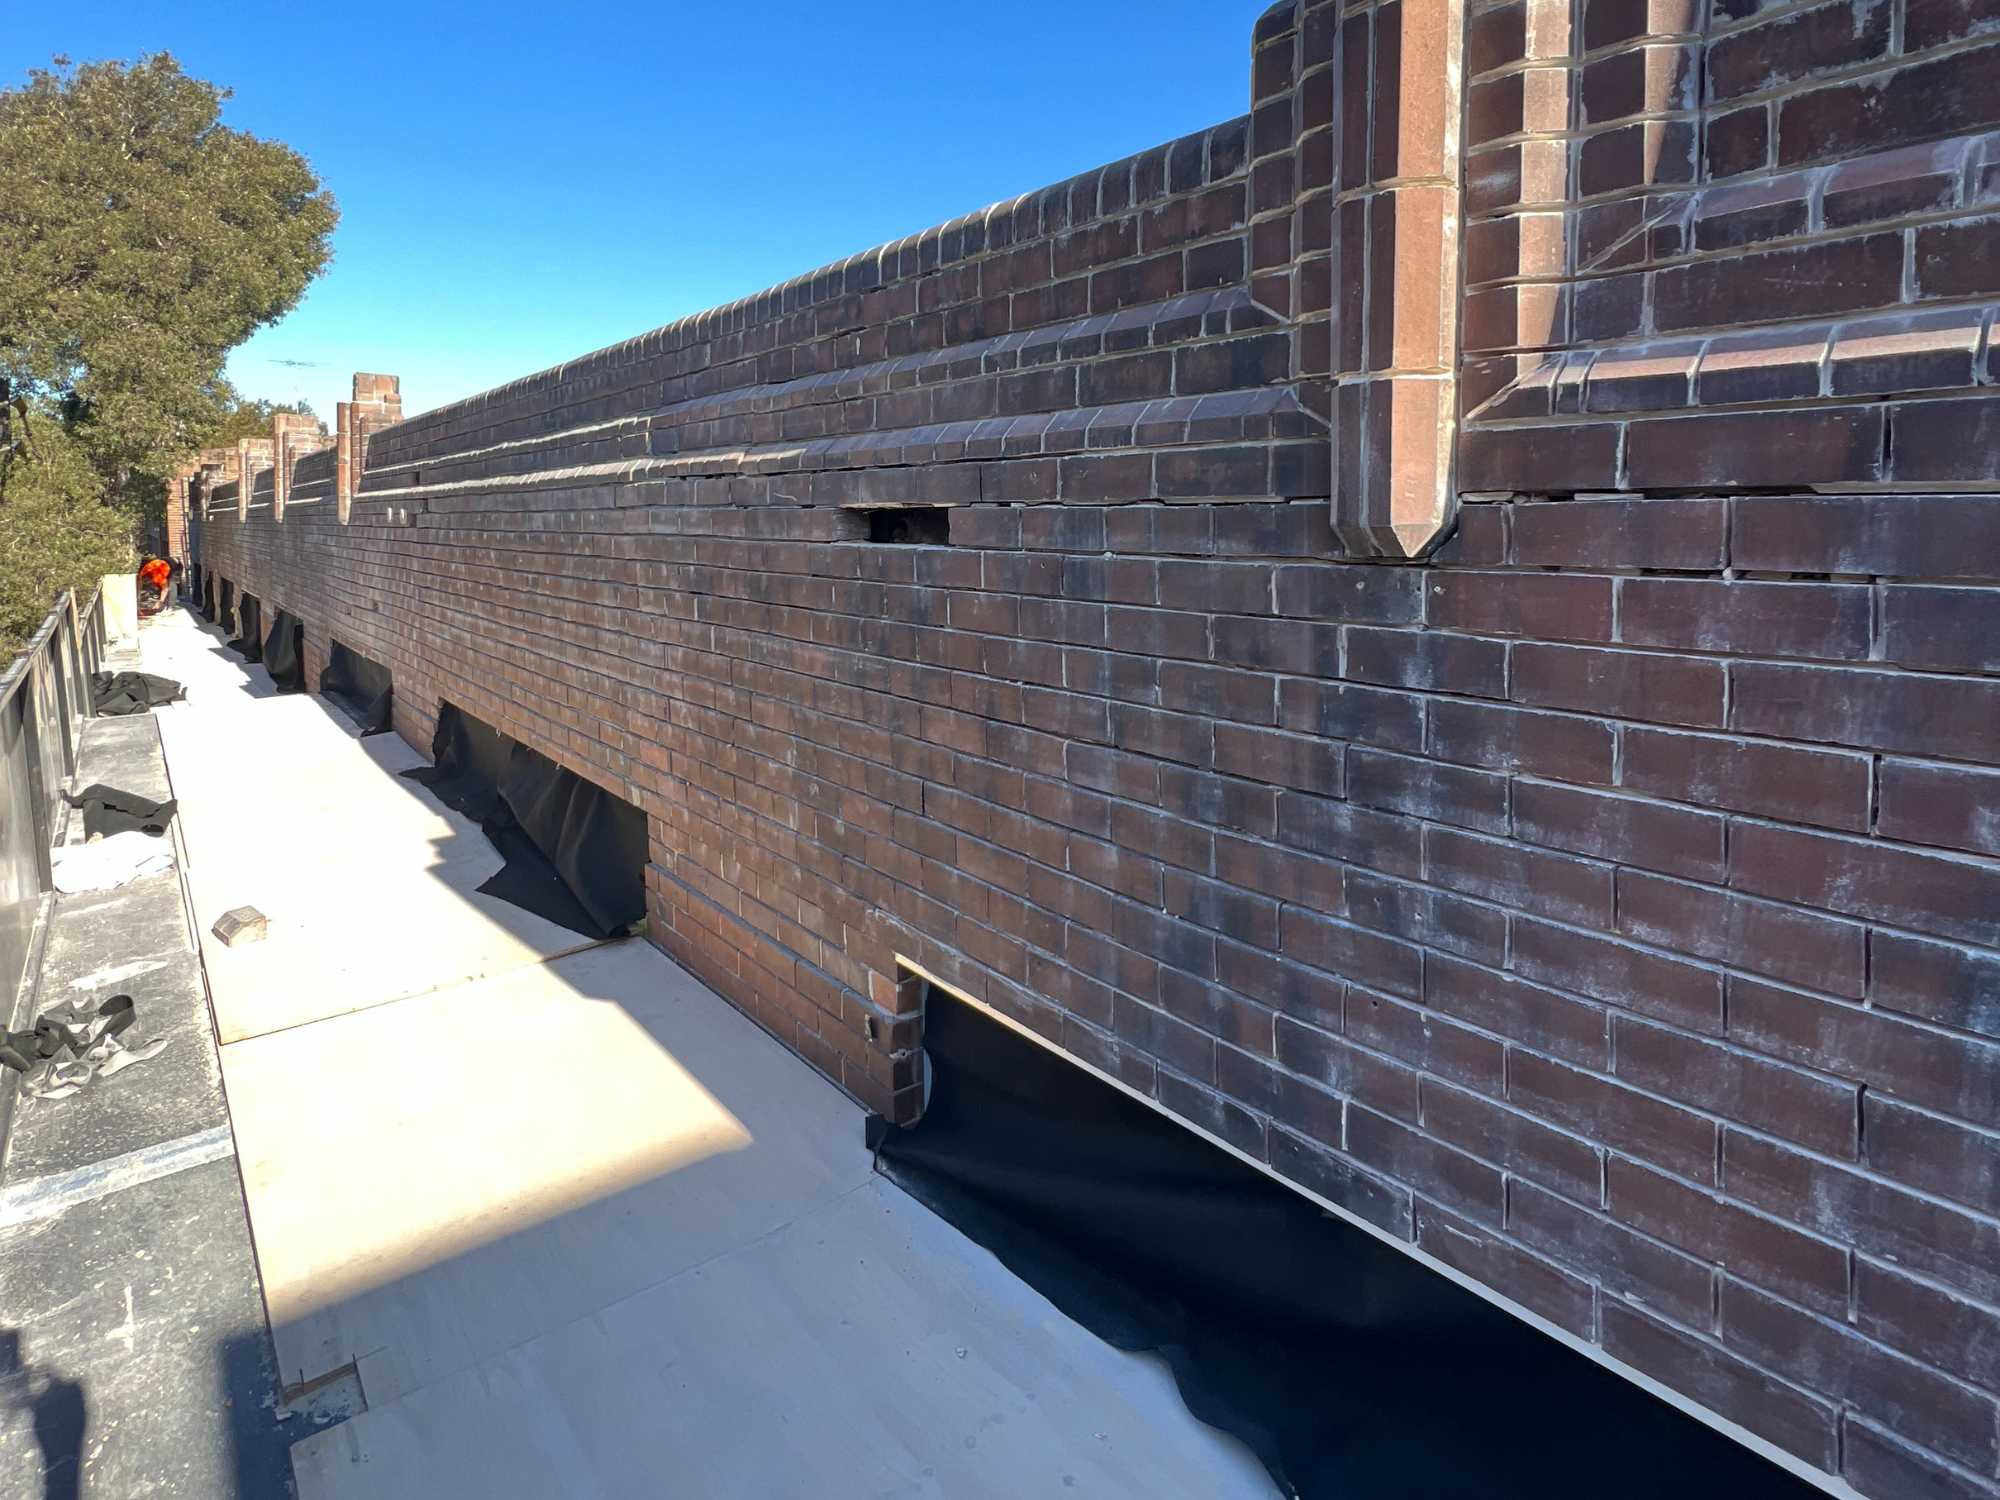
The restoration of the brick heritage facade and roof replacement above a busy council footpath needed rigorous safety measures and a meticulous permit process to protect public well-being and preserve historical value.
The project also demanded innovative weatherproofing techniques to maintain weather tightness and interior protection during the unpredictable roof installation phase.
.jpeg)
.jpeg)
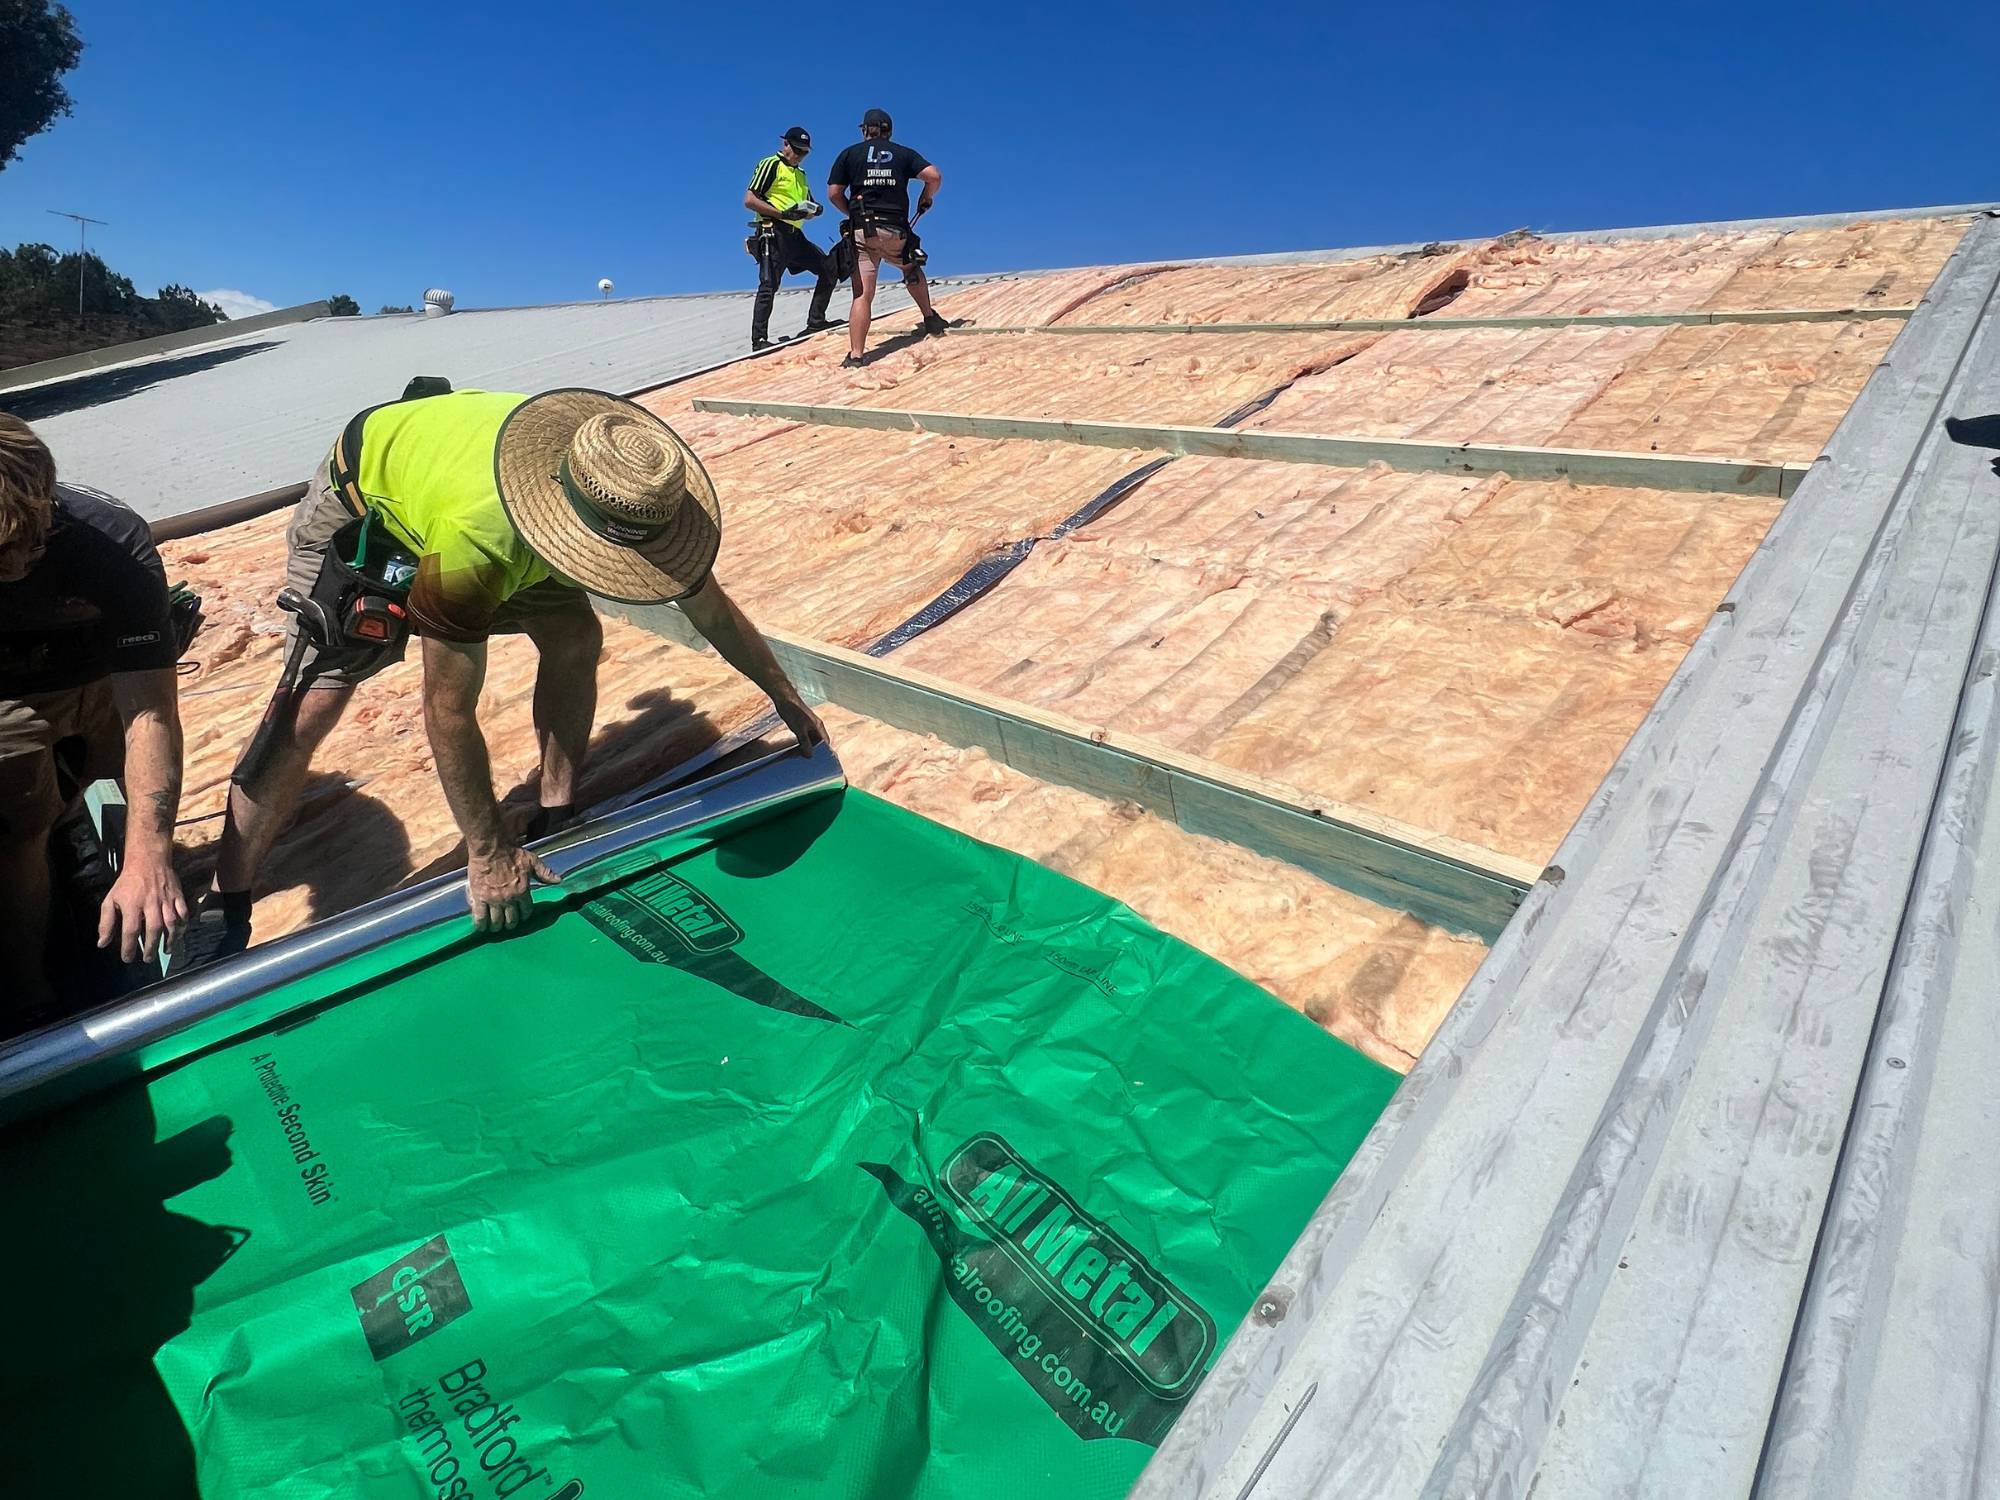
Seamless safety and weatherproofing
We fortified public safety and ensured continuous weatherproofing by integrating overhead protection, securing power lines, and adopting a phased approach to roof replacement.
Overhead Protection:A robust steel gantry provided essential overhead protection, ensuring public safety beneath the worksite.
Power Line Safety:We equipped power lines with tiger tails for heightened electrical safety around the construction zone.
Staged Roof Replacement:Delaying the inevitable repair will always result in more damage that would require more extensive and costly interventions.
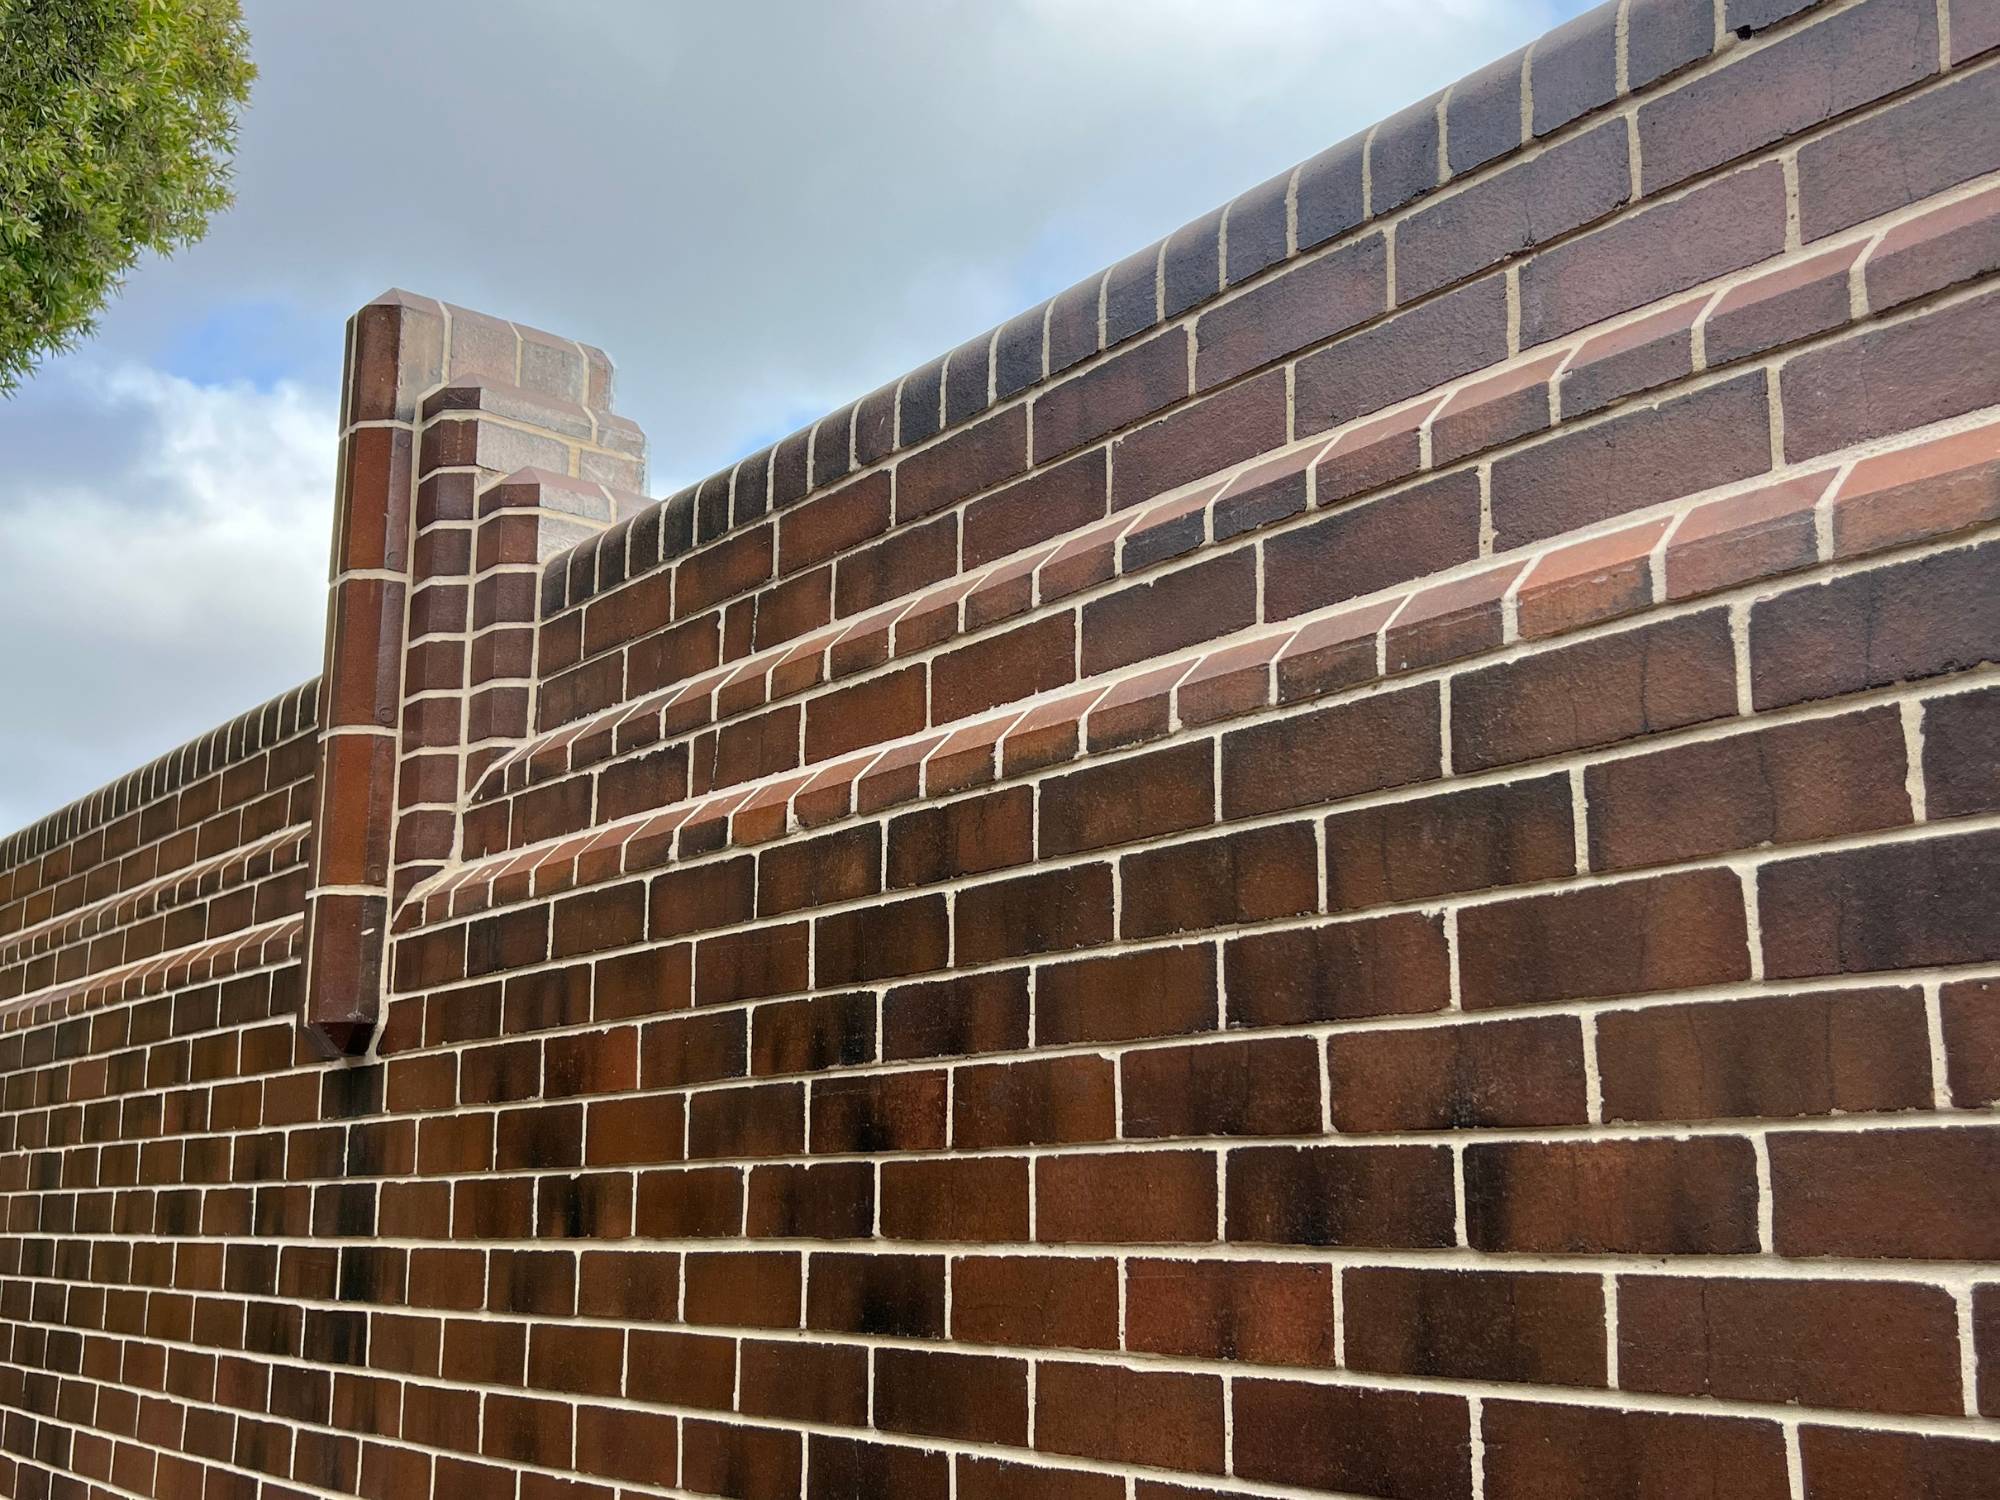
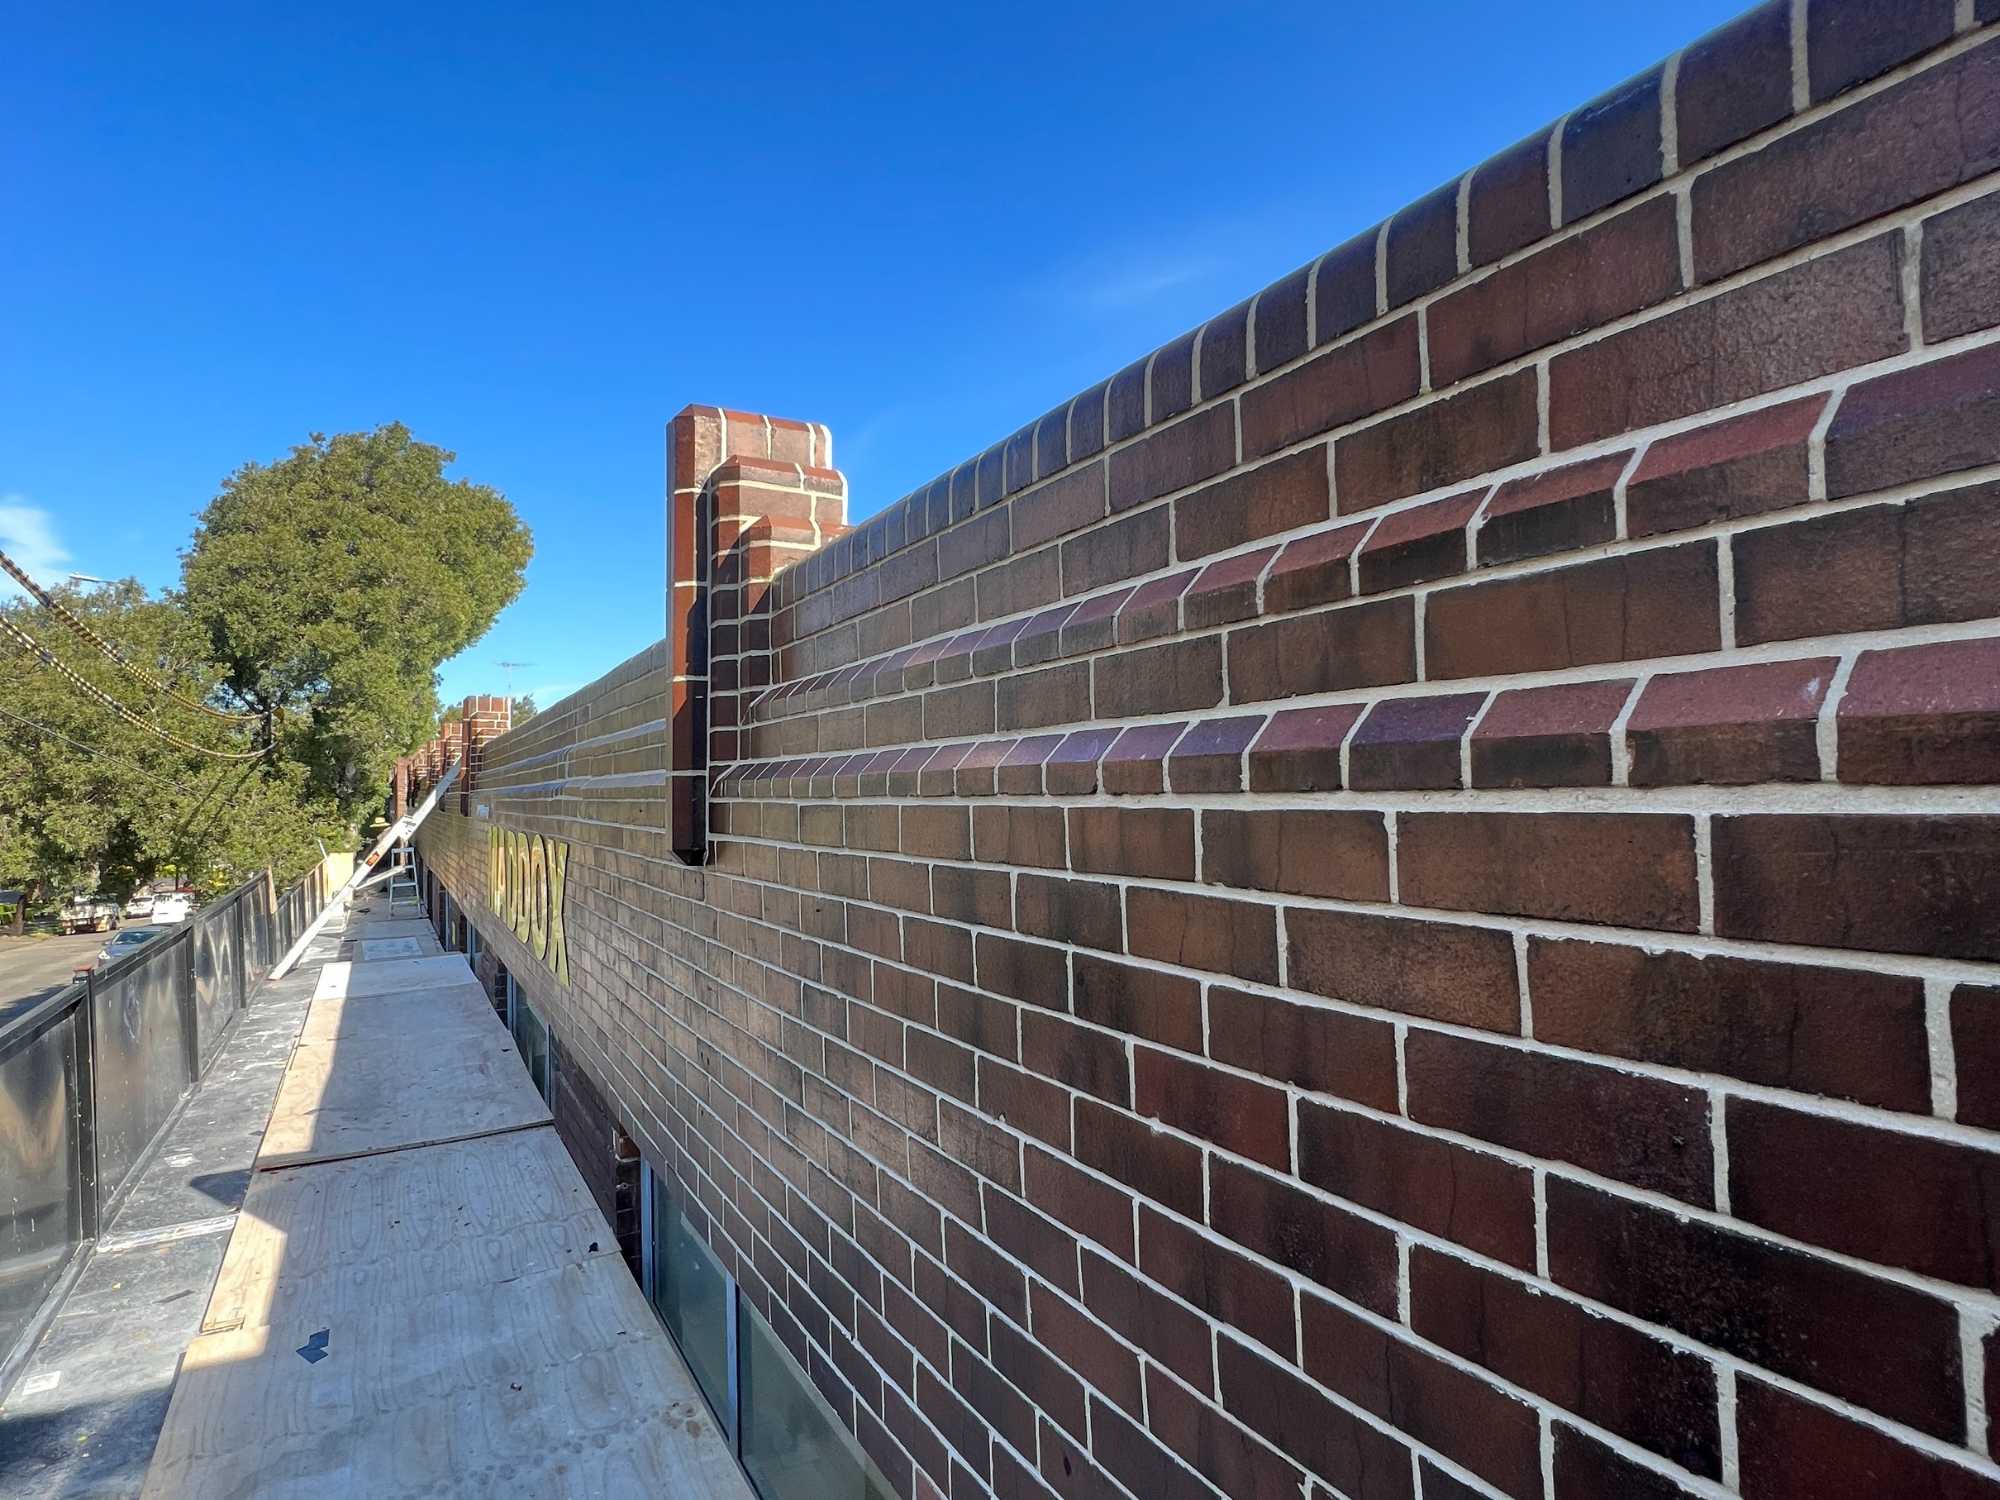
HERITAGE FACADE RESTORATION
Eroded mortar had caused bricks to loosen, some falling onto the public footpath below, presenting immediate safety hazards.
The building's age meant it was constructed without modern movement joints, which led to cracks from thermal expansion and contraction.
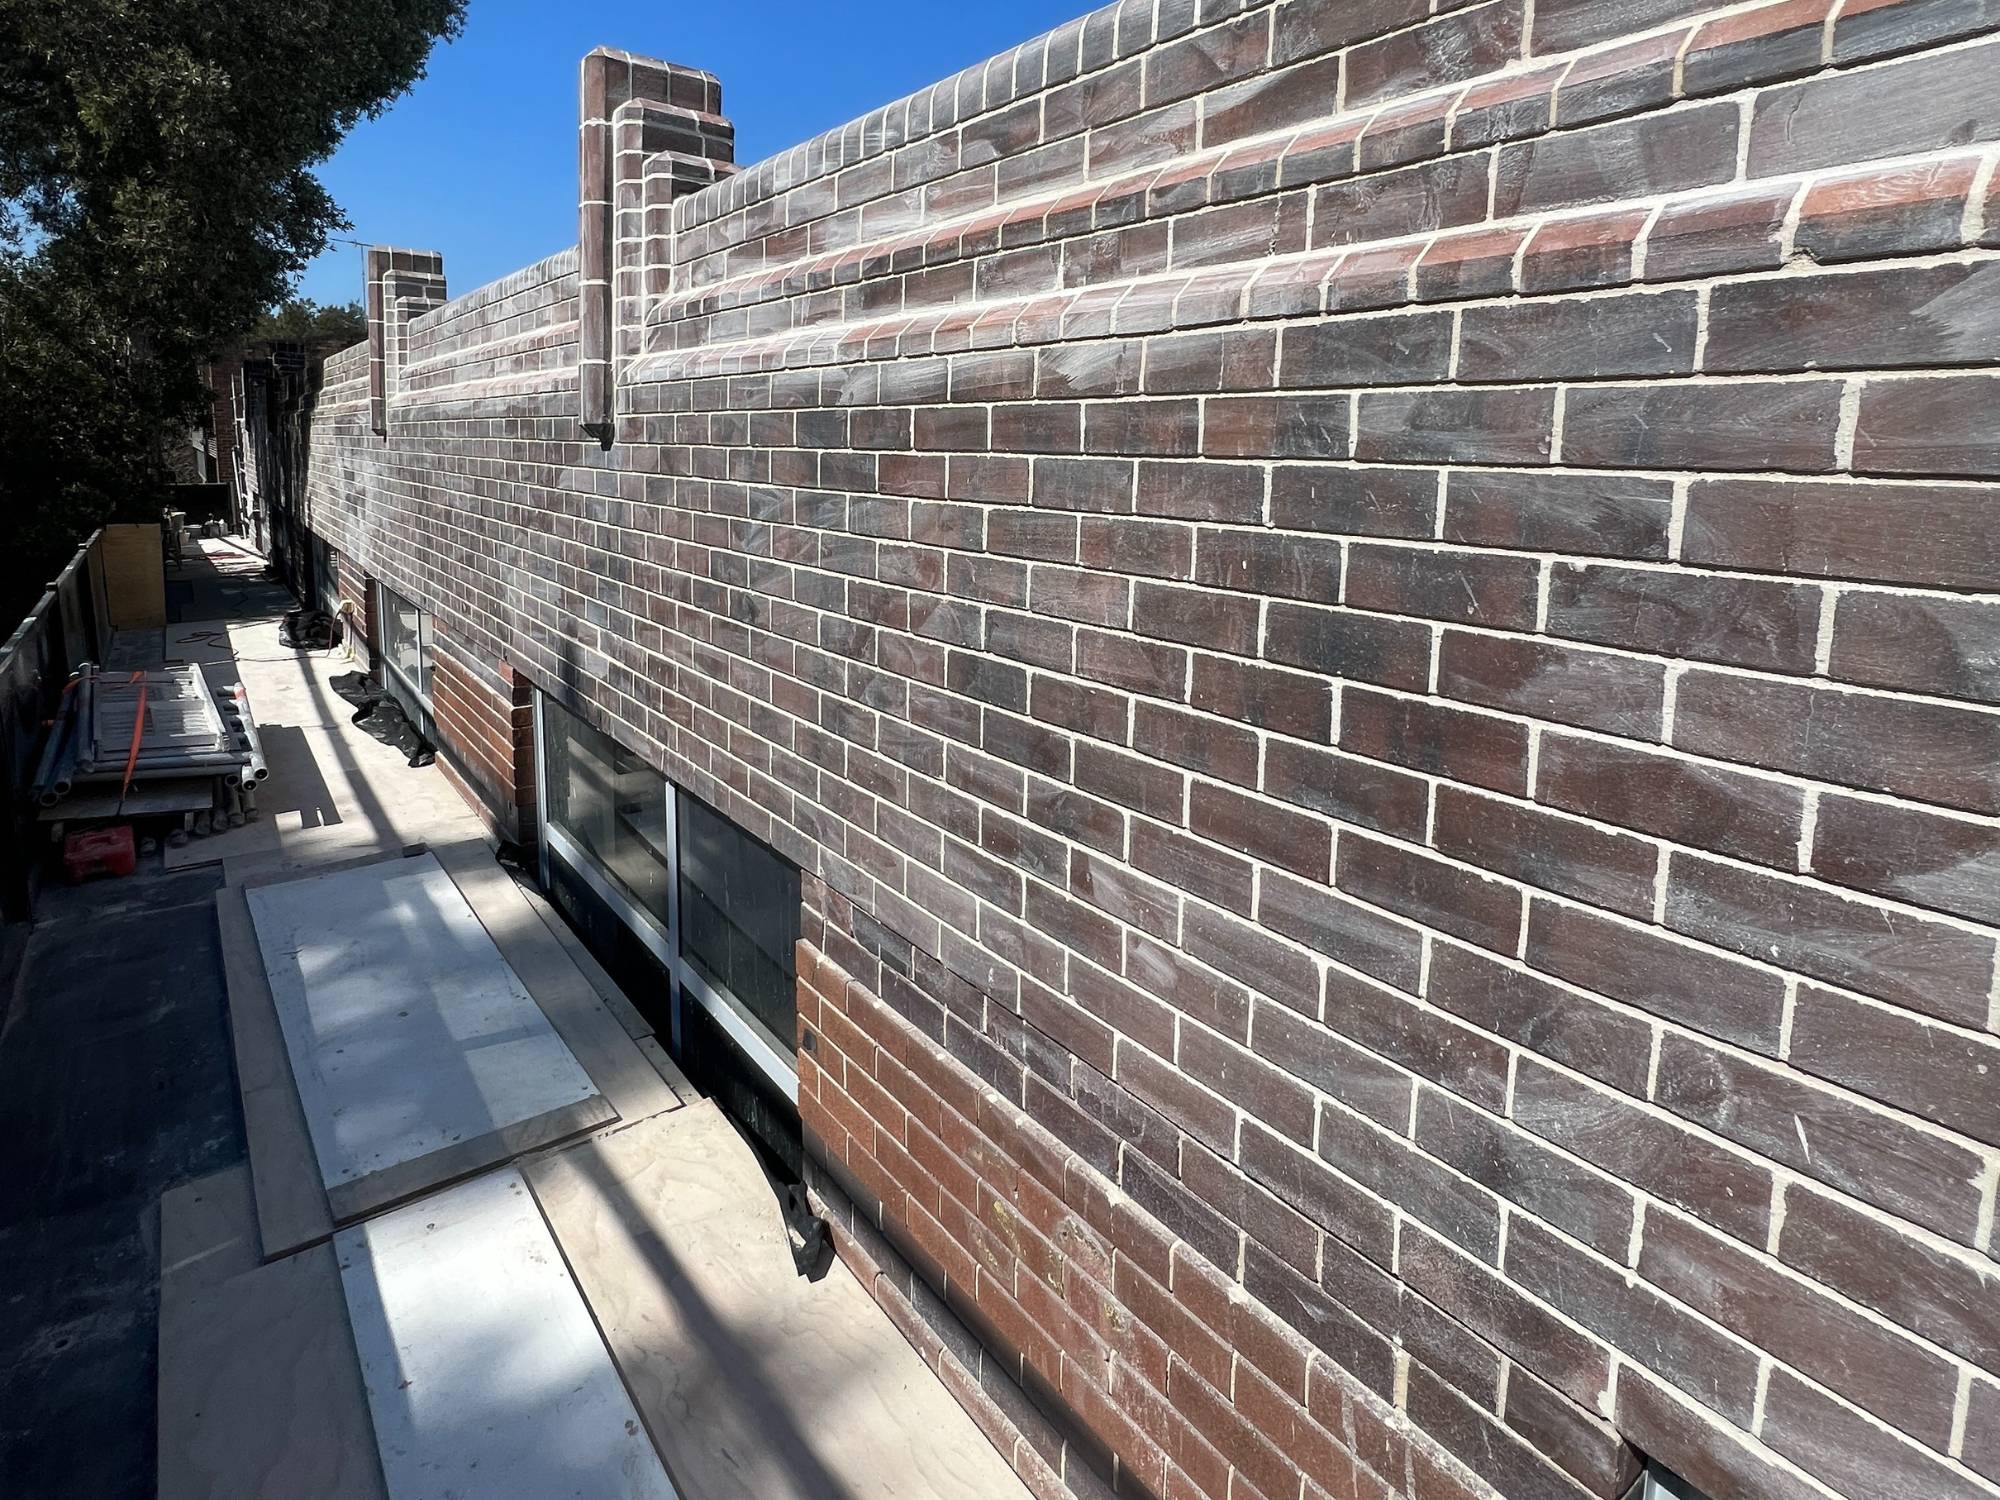
The bricks' vulnerability to water only accelerated the degradation. To address this, we applied a clear sealer, providing water protection while preserving the bricks' original heritage aesthetic.
Brick Repointing to Heritage Council of NSW Guidelines
Brick Crack Stitching to reinfoce cracks in brickwork
Clear Brick Sealer to form a barrier that repels water
.jpeg)
The brick repointing process
Mortar RemovalOld, damaged mortar was delicately removed from between the bricks to prepare for the new mortar application.
Mortar MatchingWe took extra care to match the new mortarto the existing color and texture, thereby ensuring that the wall's historicalappearance was preserved.
ApplicationThe new mortar was carefully applied to thejoints, filling them thoroughly to restore stability to the bricks.
FINISHING TOUCHESEach joint was then neatly finished tomatch the wall's original style, a process known as 'tooling', which also helpsto compact the mortar and seal the joint from weathering.
Acid WashAfter repointing, an acid wash was applied toclean the bricks and highlight the fresh mortar, revitalizing the wall’soverall look.
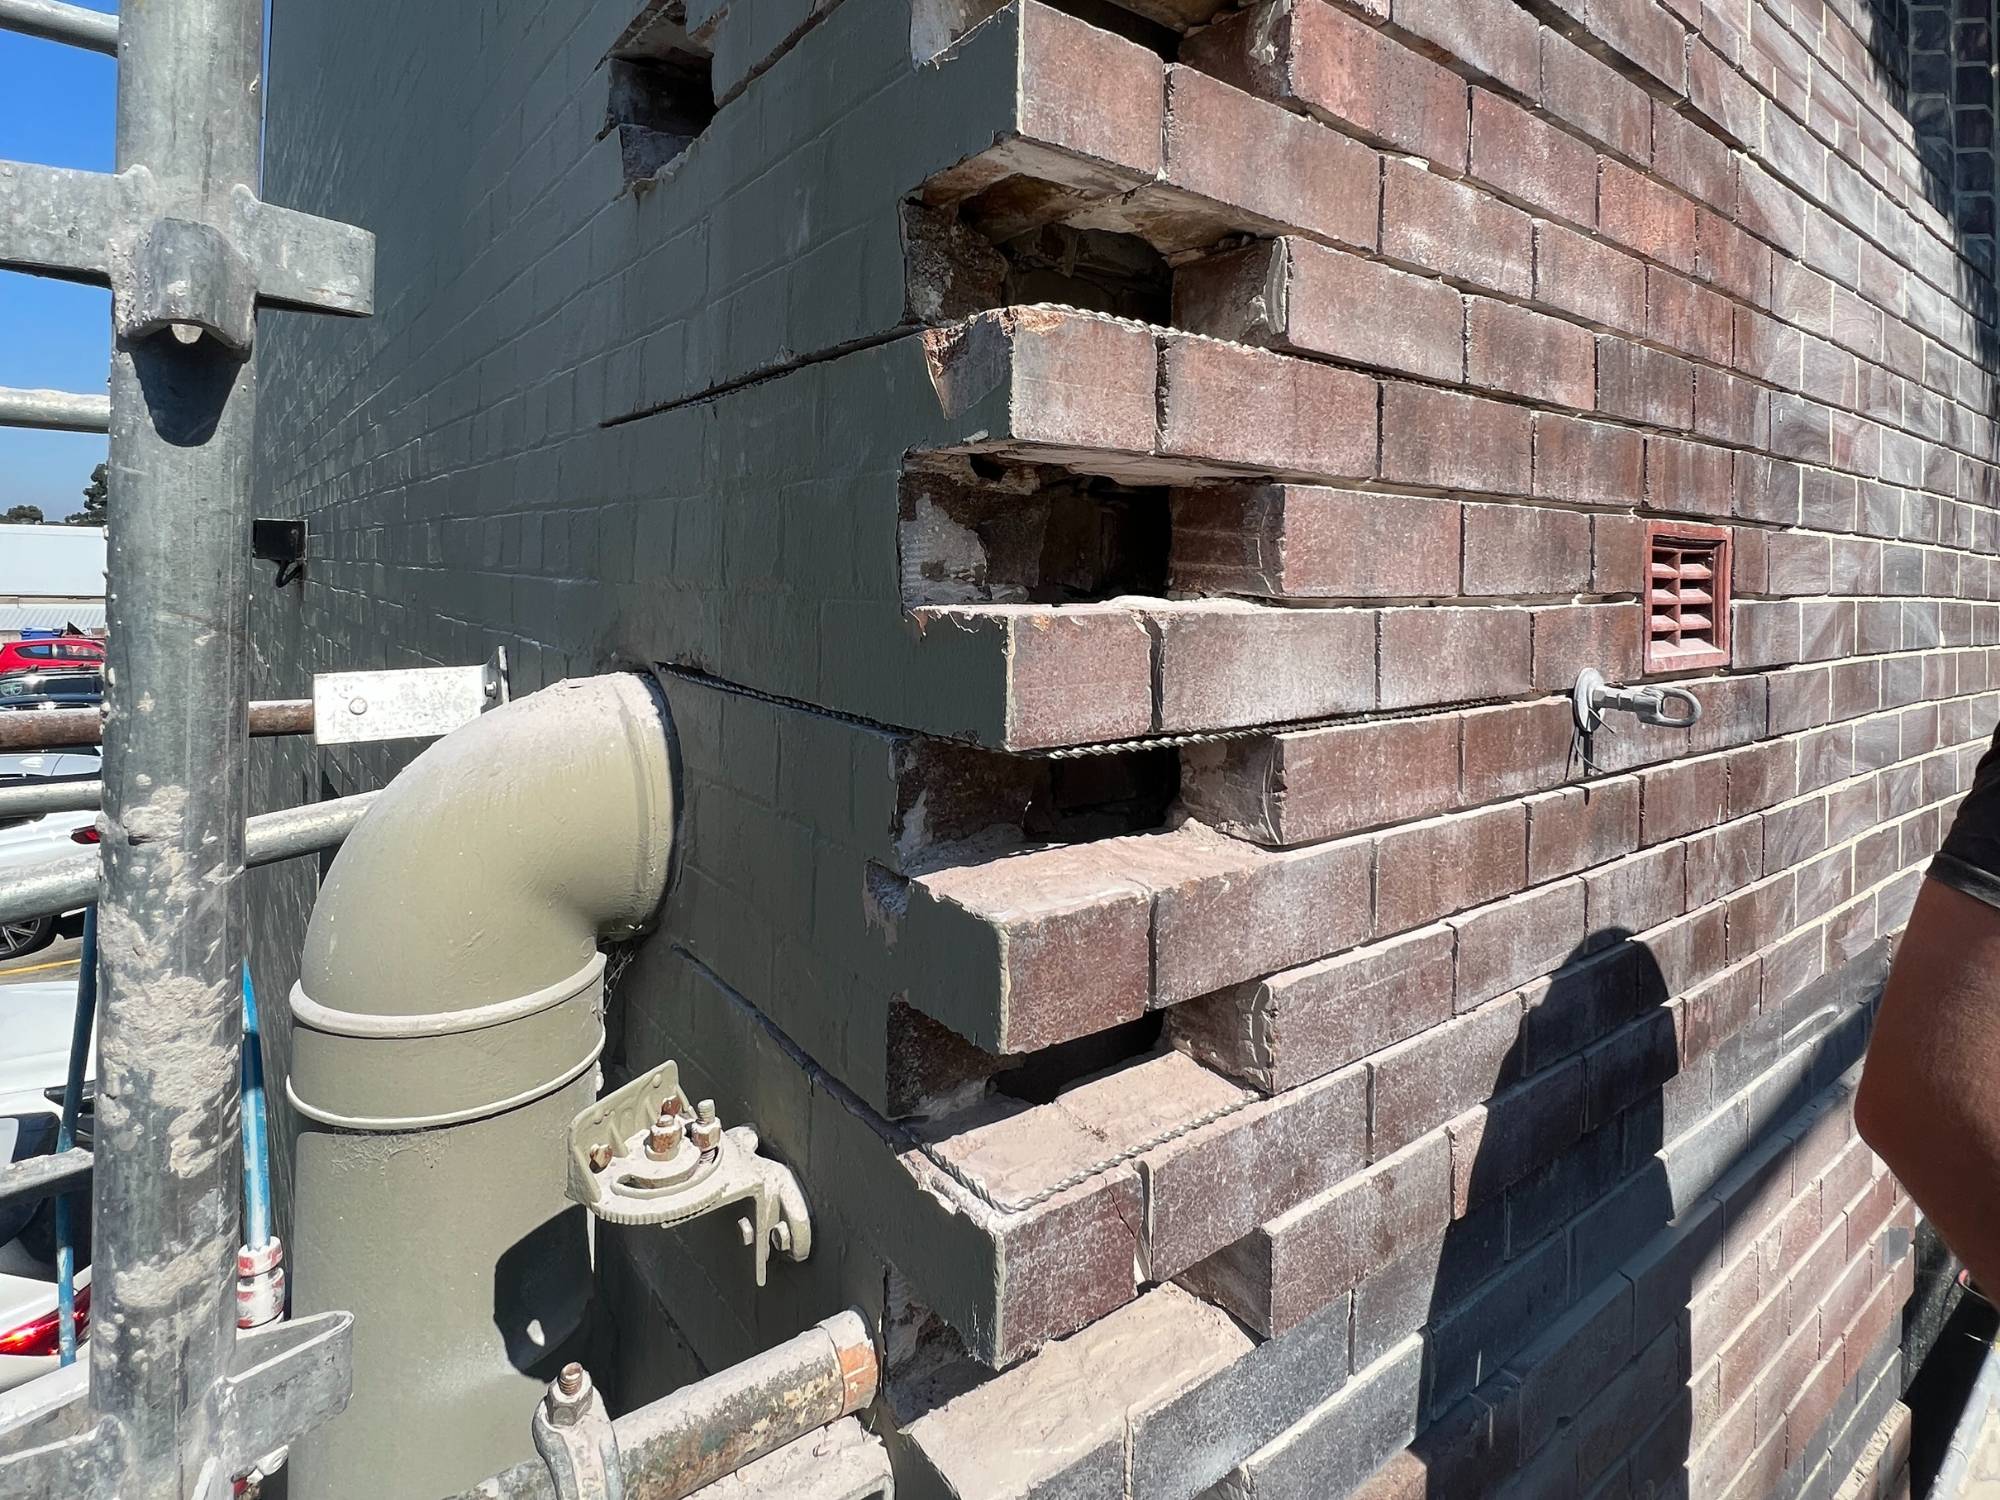
HOW TO CRACK STITCH BRICKS
The installation of Helifix bars reinforces the wall by effectively tying the brickwork together.
Joint PreparationWe carefully remove the old mortar from the brick joints, creating a clean space for Helifix bar installation.
Epoxy Grout BaseA bead of high-strength epoxy grout is applied within the cleared joints, serving as an anchor for the Helifix bars.
Helifix Bar InstallationStainless steel Helifix bars are carefully inserted across cracks to structurally integrate the wall sections, akin to reinforcement in concrete
Secondary Epoxy ApplicationAnother bead of epoxy grout is applied on top to encapsulate the bars and ensure they are fully bonded to the brickwork.
.jpeg)
THE WONDERS OF BRICK SEALING
The application of a clear brick sealer not only protects the brickwork but also enhances its durability by imparting hydrophobic properties that repel water.
Surface PreparationBefore sealing, we ensure the brickwork is thoroughly cleaned and dry, removing any dirt or debris.
Sealer SelectionWe utilised a high-quality, penetrating hydrophobic clear sealer providing a strong barrier against moisture without altering the appearance of the bricks.
Application TechniqueThe clear sealer is applied using a roller, ensuring even coverage for complete protection.
Special attention is given to mortar joints and any areas that are more susceptible to water ingress.
AbsorptionWe allow the sealer to penetrate deeply into the brick and mortar, creating a moisture-repellent layer.
InspectionAfter the sealer has cured, we inspect the coverage to confirm that the protective layer is uniform.

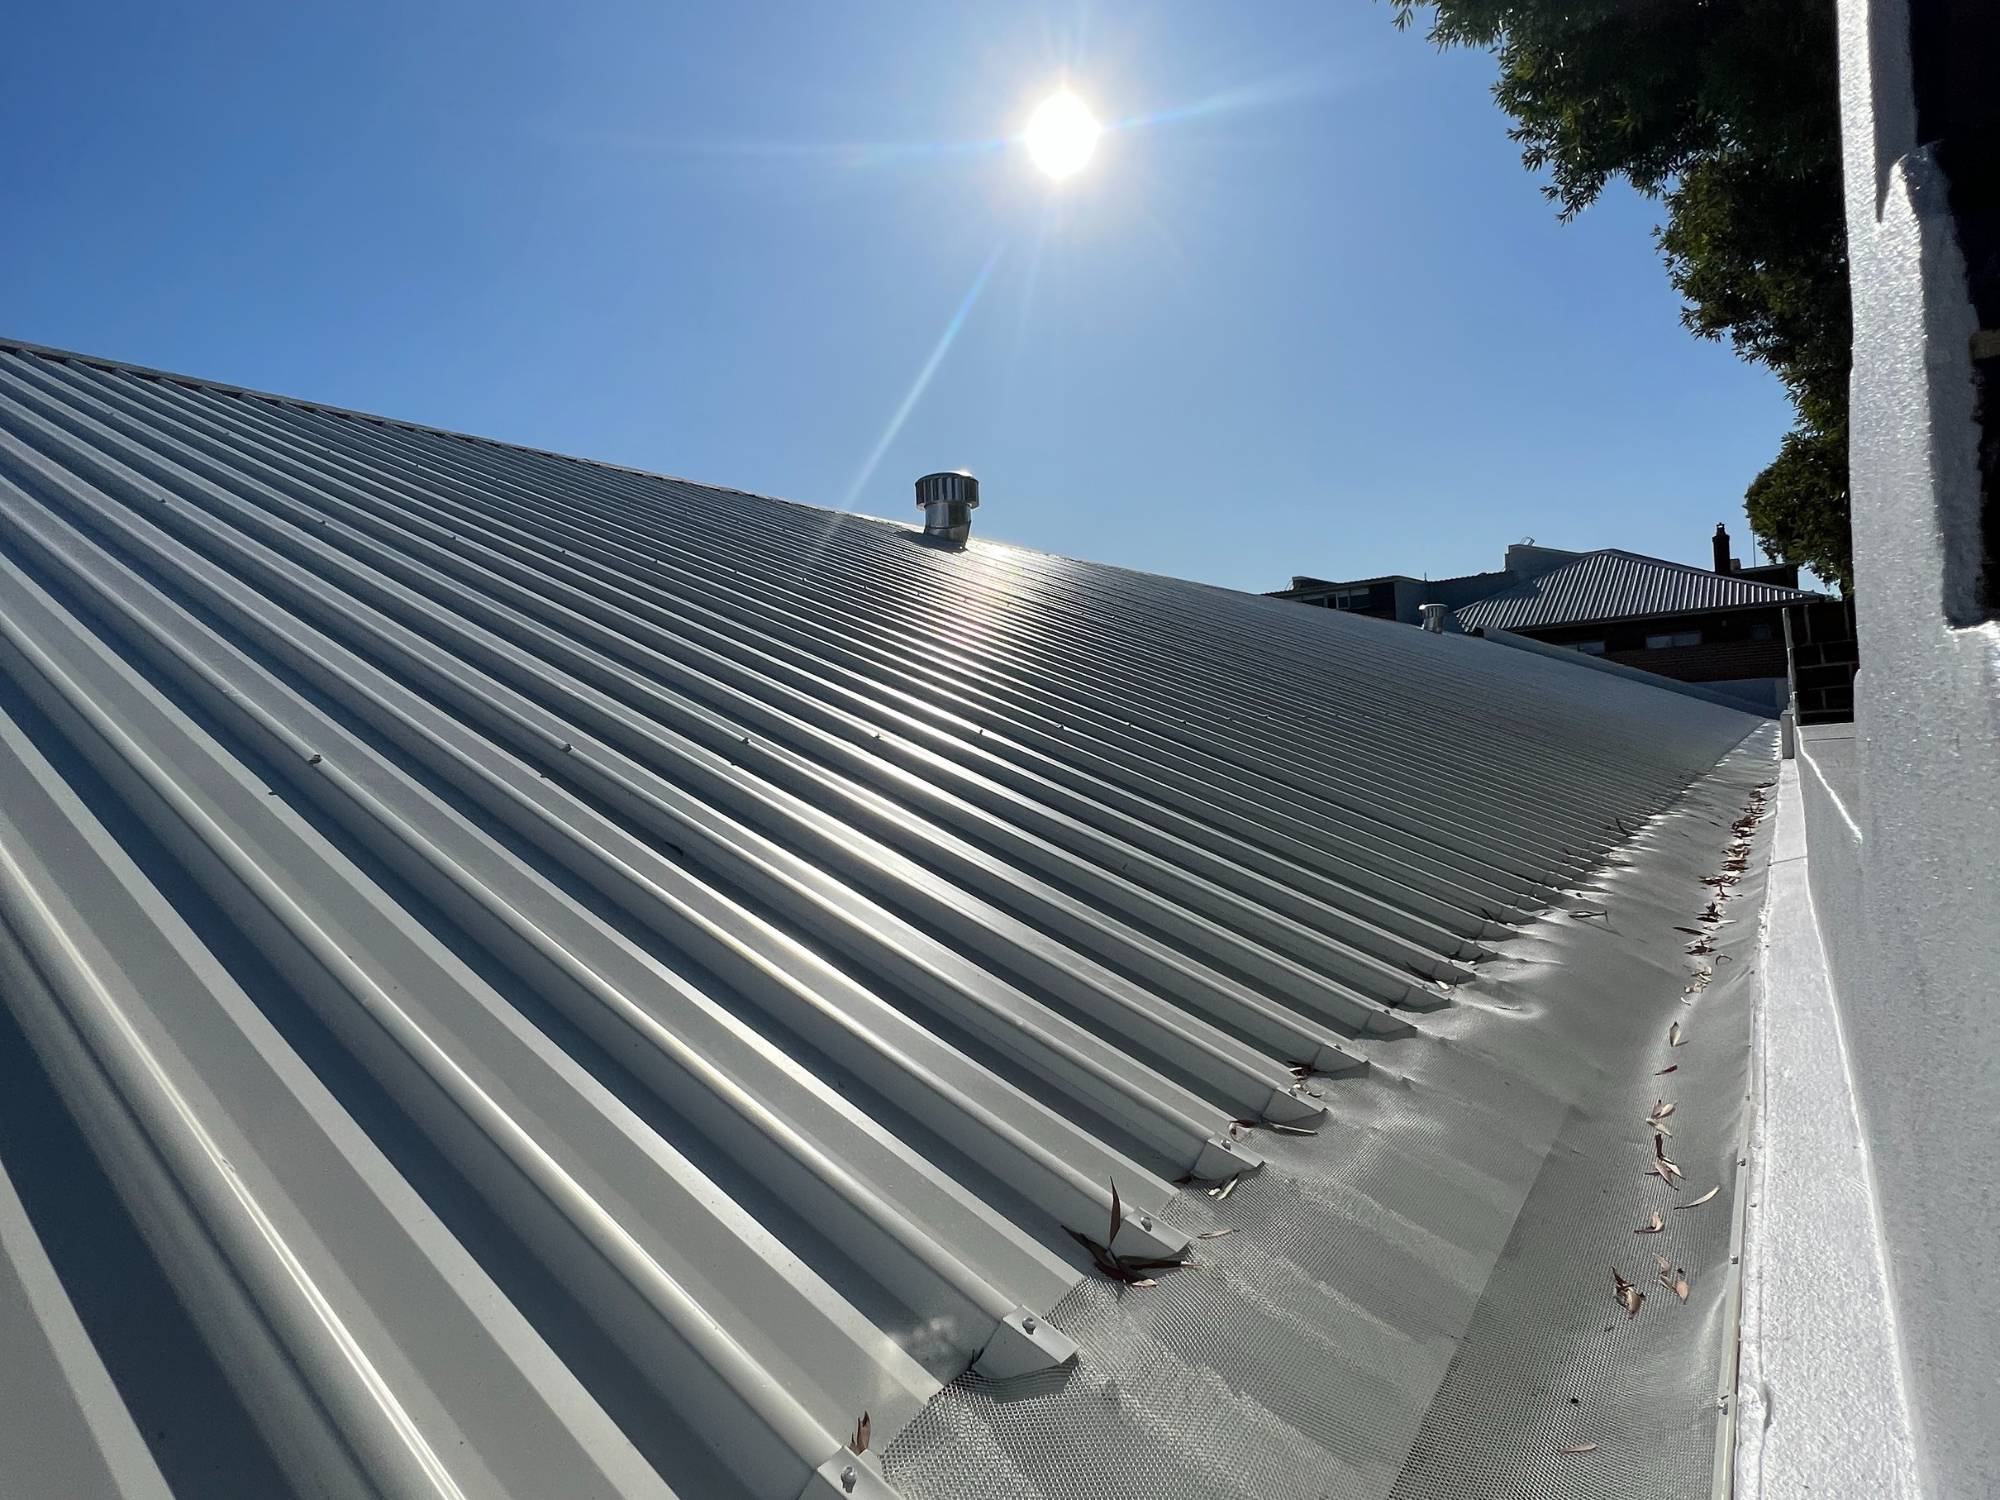
Colorbond roof replacement
Our approach focused on three pivotal upgrades:
Box Gutter Drainage UpgradesWe increased the dimensions of the box gutters, enabling a greater volume of water to be channeled effectively and improve water flow out lets
Timber Purlin UpgradesTo accommodate the upgraded gutters, the roof's elevation was increased using H2 timber purlins.
Colorbond Roof ReplacementCompleting the restoration, we installed new roofing sheets complemented by engineered sarking and insulation to enhance weather resistance and thermal insulation.

PROJECT OUTCOME
Lower Premiums:Reduced Insurance Risk
Enhanced Safety: Create a Secure Environment
Structural Integrity: Extended Lifespan
Peace of mind: Workmanship Guarantee
This sealing process ultimately fortifies the brick structure against the elements, prolonging its life and maintaining its aesthetic appeal.
CLIENT PROFILE
Client: Owners Corporation
Sector: Residential Construction
Location: Vaucluse, Sydney
Project Value: $35,000
Background: Kevin faced a critical challenge - a deteriorating concrete pool affected by spalling and honeycombing. Safety, quality and aesthetics were at stake.

the Challenge
The concrete spalling issues affecting Kevin's pool manifested along the pool's edges, where it reached a critical point, causing concrete to disintegrate, exposing the steel reinforcement.
The severity of the situation became apparent when the structural engineer assessed the pool's condition, deeming it unsuitable for certification to AS3600: Concrete Structures.


A TICKING TIME BOMB
Concrete spalling, once detected, should never be underestimated, as it has the potential to escalate into a much larger and more expensive problem.

Safety:Deteriorating concrete could have continued to dislodge, posing a danger to anyone using the pool area.
Structural Integrity:Over time, untreated spalling can compromise the structural integrity of the affected area.
Increased Costs:Delaying the inevitable repair will always result in more damage that would require more extensive and costly interventions.
OUR QUALITY GUARANTEE
Adhering to Australian Standards for concrete spalling repair was non-negotiable.
We approached the task with a commitment to quality, ensuring that every aspect of the repair work met these rigorous standards.
To provide Kevin with peace of mind and underscore our confidence in our work, we offered a substantial 6-year guarantee.
Adherance to Australian Standards 3600: Concrete Structures
Adherance to ACRA: Guide to Concrete Repair
Workmanship and Materials Guarantee
Site Establishment in one week
Project completed in just one week
Prioritised safety throughout repair process
OUR RESPONSIVENESS
Time was of the essence.
The deteriorating state of his pool required immediate attention.
Our team, embarked on the project with the goal of delivering swift results without compromising safety.
In just one week, from the project's commencement to its completion, we successfully restored Kevin's pool to its former glory.
OUR EFFICIENCY
Unforeseen concrete spalling repair projects can put a strain on budgets. Our limited budget prompted us to think innovatively.
We opted to use micro-concrete instead of patch repair, enabling us to maximize the scope within the given constraints.
This strategic approach not only optimized costs but also expedited the repair process, minimizing inconvenience for Kevin
Optimised cost using innovative concrete repair methods
We used pourable micro-concrete instead of repair mortar
Completed extensive repairs within budget

REPAIR METHODOLOGY
Our concrete spalling repair methodology strictly followed ACRA: Guide to Concrete Repair.

Surface Preparation

Reinforcement Priming

Concrete Application

Concrete Finishing
1. SURFACE PREPARATION
Assessment: Conducted a thorough assessment of the concrete spalling to determine the extent of damage.
Cleaning:Removed loose concrete, dirt, and contaminants from the affected areas to ensure proper adhesion of the concrete repair material.
Surface Profiling: Prepared the surfaces to achieve the necessary texture for optimum bonding between the existing concrete and the repair material.


2. REINFORCEMENT PRIMING
Evaluation: Assessed the condition of the underlying steel reinforcement to identify areas requiring attention.
Priming: Treated and primed the steel reinforcement where necessary to prevent further corrosion and ensure structural integrity.
Compatibility: Ensured that the priming materials used were compatible with the micro concrete for a durable bond.
3. CONCRETE APPLICATION
Precise Application: Applied the micro concrete meticulously to the affected areas, utilizing specialized techniques to achieve a uniform and structurally sound surface.
Material Selection: Opted for micro concrete due to its exceptional durability and compatibility with the existing concrete.


4. CONCRETE FINISHING
Aesthetics: Focused on restoring the aesthetic appeal of the pool by smoothing and finishing the repaired surfaces.
Texture Matching: Ensured that the repaired areas seamlessly matched the surrounding concrete, achieving a visually consistent appearance.
Final Inspection: Conducted a final inspection to verify the quality of the finishing and overall repair work, maintaining our commitment to excellence.


PROJECT OUTCOME
Enhanced Safety: Eliminated Risk of Concrete Falling
Structural Integrity: Extended Lifespan
Compliance: ACRA: Guide to Concrete Repair
Peace of Mind: Workmanship Guarantee

Take the next step.
Let’s find the best solution for your property.
Connect with an Expert.
Phone: Call us at 0410 515 509
Email: Send us a message at hello@atomicprojects.com.au
Form: Fill out the form and we'll respond promptly -Often the next day.
Oops! Something went wrong while submitting the form.
